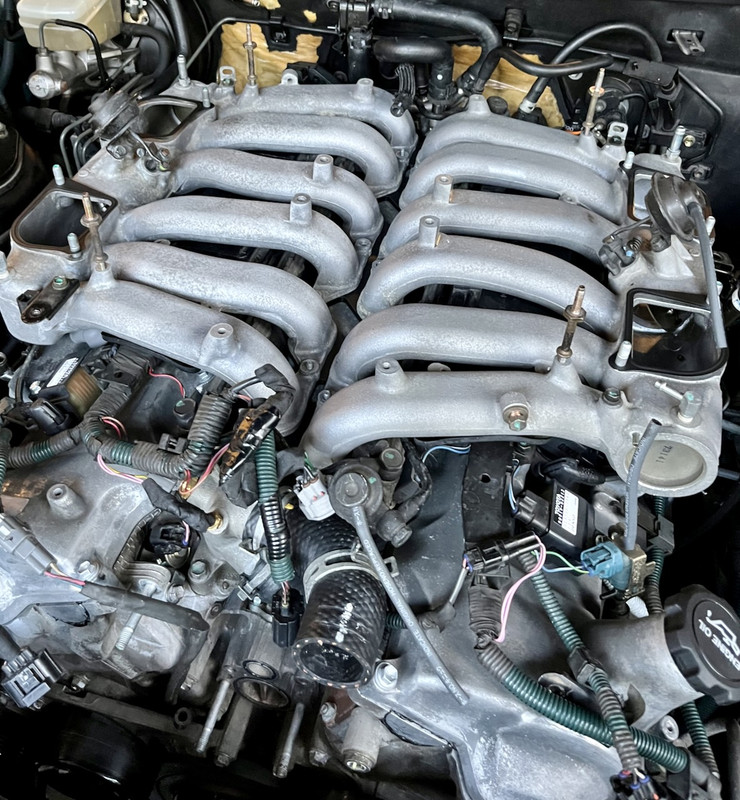
Replacing Knock Senors

Post Reply
User avatar
Eric
Posts: 85
Joined: Tue Jun 28, 2022 8:03 pm

Replacing Knock Senors

Post by Eric »

I had persistent "ECT" code under heavy engine load. Techsteam said no communication with knock sensors bank 1 and bank 2.

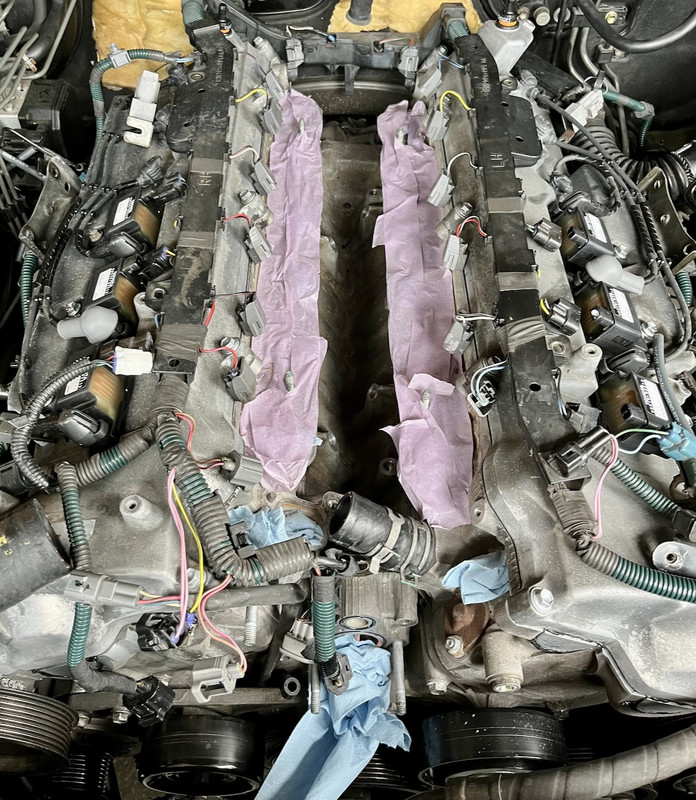
No easy way to tell for sure without diving into the engine valley.

Turns out the knock sensor were corroded but the wiring had turned to dust too.

Here is a run down of how to replace your 4x knock sensors and wiring.


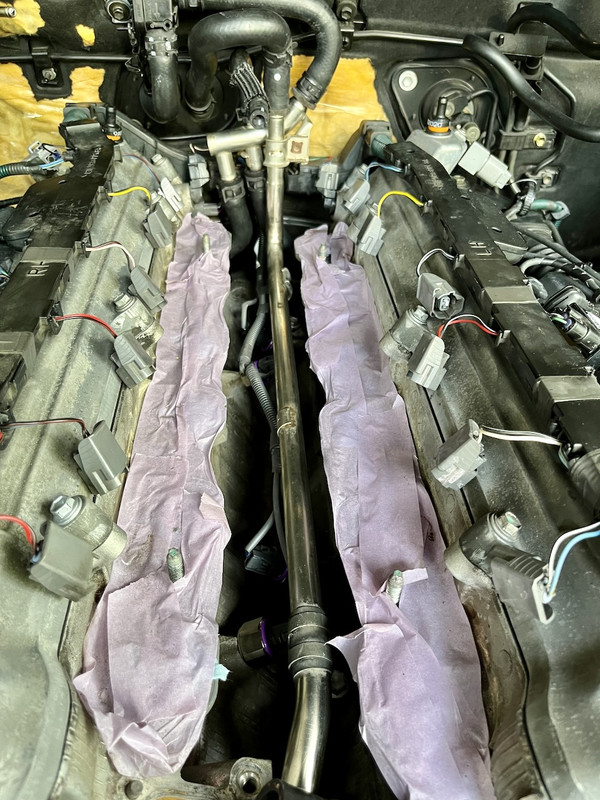
Starting backwards. Here is the top half of the engine off exposing the valley of the V12.

Image
1997 Toyota Century - Eternal Black <202> - Seiko Clock
User avatar
Eric
Posts: 85
Joined: Tue Jun 28, 2022 8:03 pm

Re: Replacing Knock Senors

Post by Eric »

On my 1997:

Parts involved:

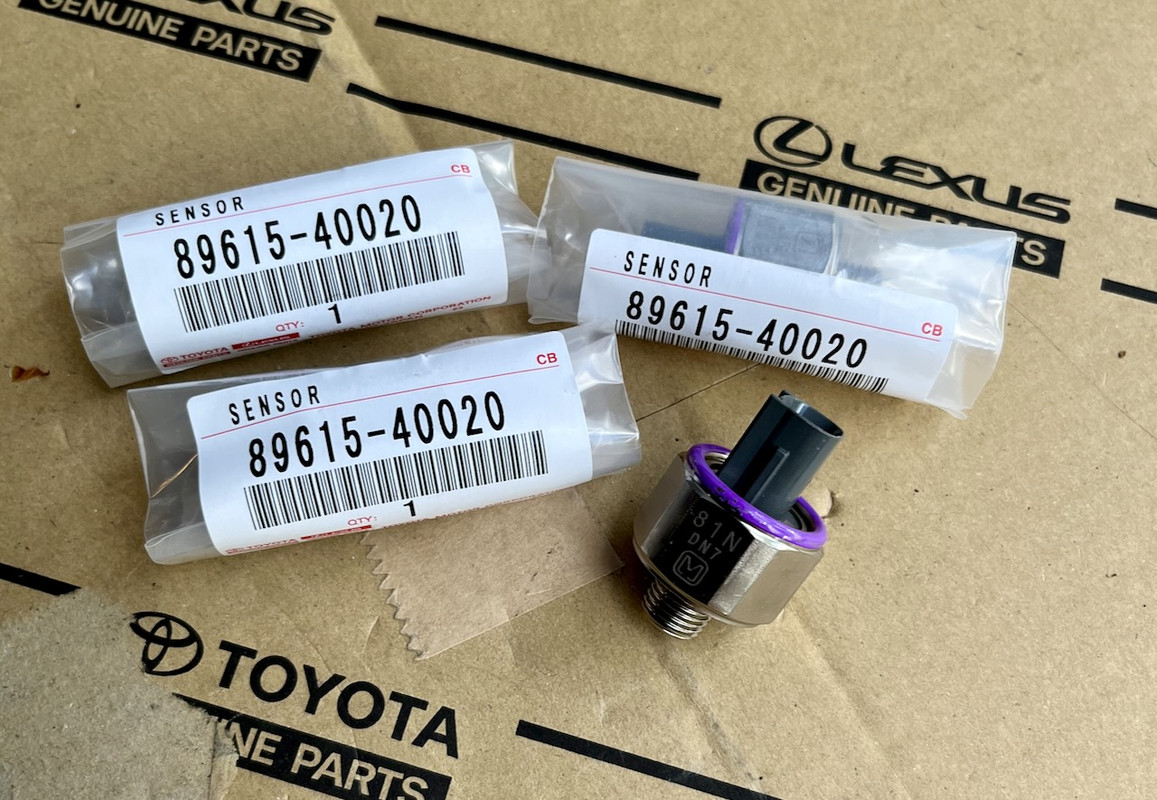
Knock Sensors x4

SENSOR, KNOCK CONTROL
89615-40020

Image

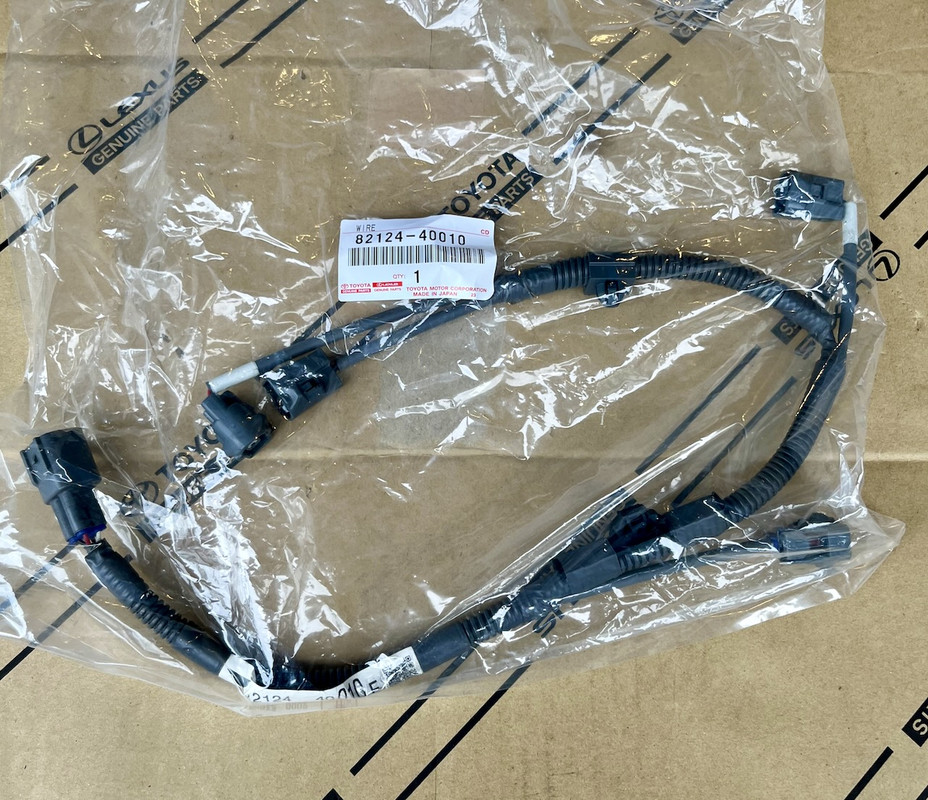
Wiring for Knock Sensors

WIRE, ENGINE, NO.4
82124-40010

Image
1997 Toyota Century - Eternal Black <202> - Seiko Clock
User avatar
Eric
Posts: 85
Joined: Tue Jun 28, 2022 8:03 pm

Re: Replacing Knock Senors

Post by Eric »

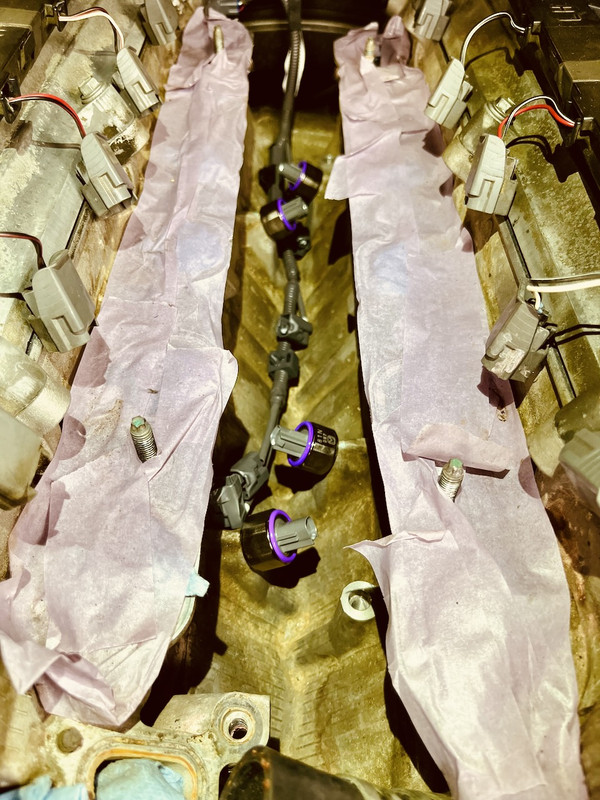
Starting with the V12 valley:

Image

Install each knock sensor and torque to 45 nm.

Image
1997 Toyota Century - Eternal Black <202> - Seiko Clock
User avatar
Eric
Posts: 85
Joined: Tue Jun 28, 2022 8:03 pm

Re: Replacing Knock Senors

Post by Eric »

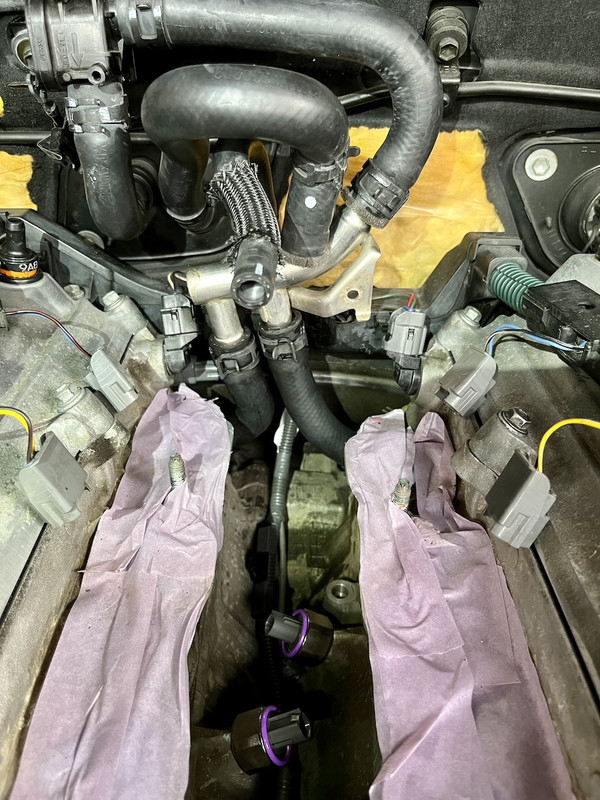
Next install the "T" shaped coolant pipe at the rear of the engine.

Consists of Pipe No 4, Hose No 3, No 4, and No 5. Do yourself a favor and order new clips for each hose. The original clips are so difficult to loosen I ended up cutting each hose. Instead of fighting the devil clip while hanging over the engine bay. :lol:


Image


Install the coolant pipe (pipe, water bypass no 3) and don't forget a new gasket where it meets the head. Where the pipe bolts to the valley is 19 nm. Where the pipe meets the head is 12 nm.

Image
1997 Toyota Century - Eternal Black <202> - Seiko Clock
User avatar
Eric
Posts: 85
Joined: Tue Jun 28, 2022 8:03 pm

Re: Replacing Knock Senors

Post by Eric »

Install intake to manifold gasket:

Image

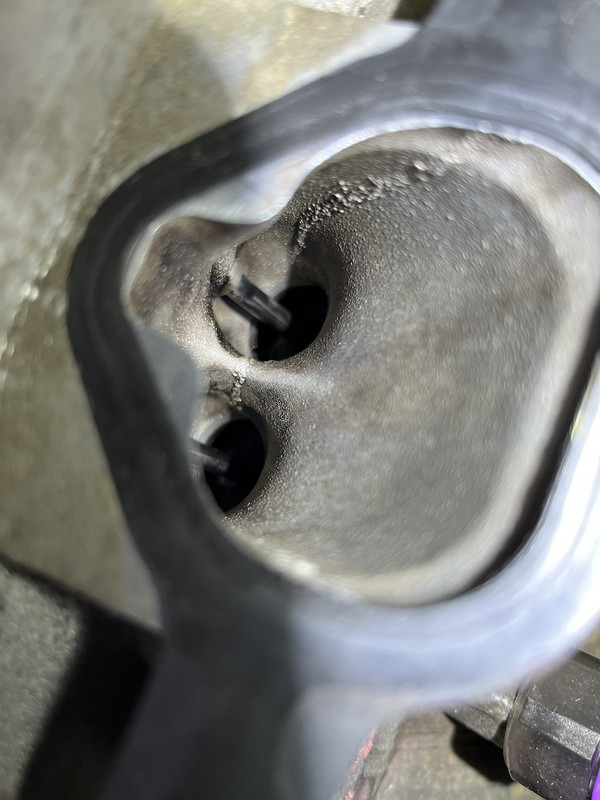
Peek inside intake:

Image
1997 Toyota Century - Eternal Black <202> - Seiko Clock
User avatar
Eric
Posts: 85
Joined: Tue Jun 28, 2022 8:03 pm

Re: Replacing Knock Senors

Post by Eric »

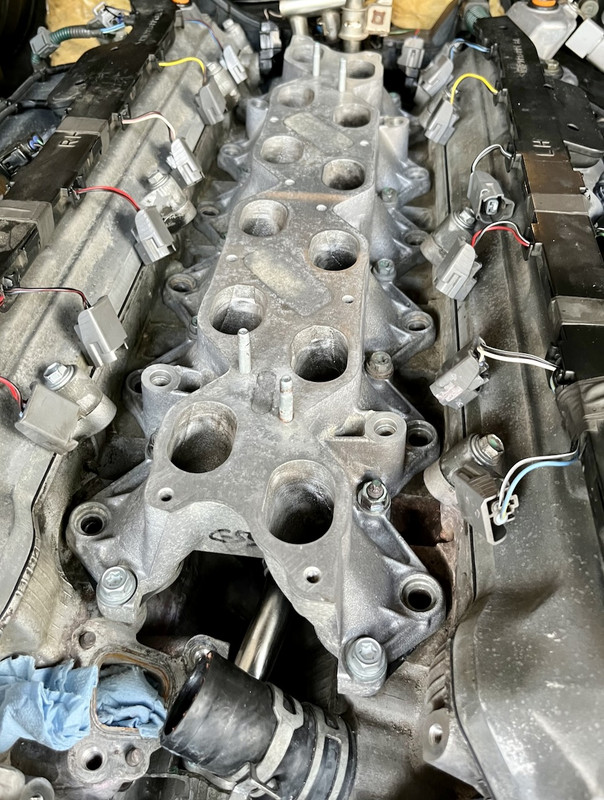
Install intake manifold:
Torque to 25nm.

Image

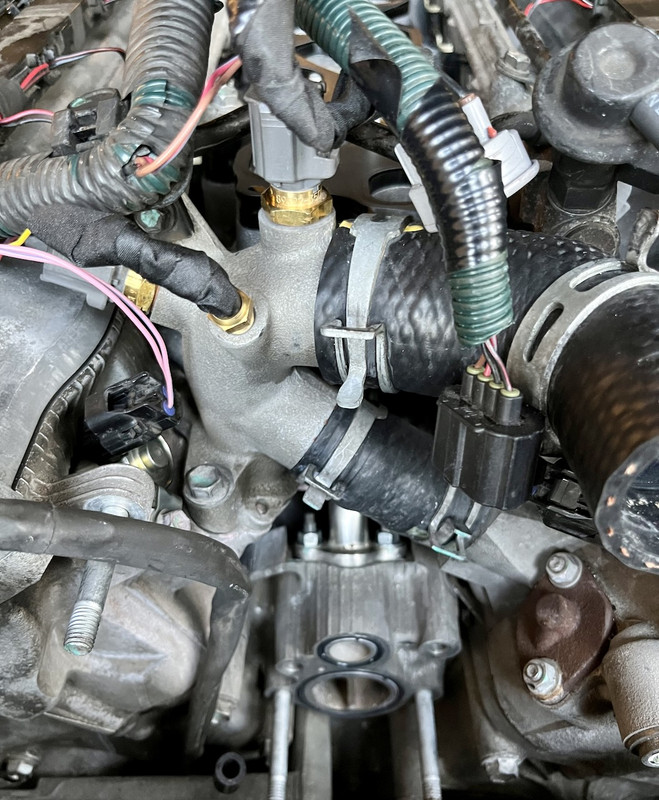
Install the front "joint water bypass"
It has 3 different coolant sensors, good time to replace them if they're worn.
This is also the step where I replaced my x2 Oil Control Valves (OCV)

Torque the bypass to 19nm.

Image
1997 Toyota Century - Eternal Black <202> - Seiko Clock
User avatar
Eric
Posts: 85
Joined: Tue Jun 28, 2022 8:03 pm

Re: Replacing Knock Senors

Post by Eric »

Put the fuel rail and injectors back.
Torque the fuel rail to 21 nm.

Install the "main gasket" aka "Gasket, Air Surge Tank To Intake Manifold"

Image

Then both intake runners, or x2 "intake air surges"
Torque to 12 nm.

Image
1997 Toyota Century - Eternal Black <202> - Seiko Clock
User avatar
Eric
Posts: 85
Joined: Tue Jun 28, 2022 8:03 pm

Re: Replacing Knock Senors

Post by Eric »

Install both "intake air connectors"
Torque to 19 nm.

Also install the "stay, connector" (The little metal bridge that gives rigidity to each air connector. It's installed in the next picture)
Torqued to 19 nm.

Image

Install both throttle bodies.
Torque to 21 nm.

Also install water pump and put back all kinds of vacuum hoses :D

Image

After that install both air hoses, each air box, both air filters, and the main resonator. Fill with toyota long-life coolant. Then pat yourself on the back for a job well done. Not many people can say they have seen the engine valley of a Japanese V12! ;)
1997 Toyota Century - Eternal Black <202> - Seiko Clock
Post Reply